Hardware Hacking for JavaScript Peeps- How I Got My Hands on Breadboards and Resistors

I totally have neglected girliemac.com. I don’t even remember when the last time I blogged for my own website, since I started writing technical articles and tutorials for PubNub where I joined last summer.
Until last year, my focus was mainly on HTML5 and mobile development, however, I am shifting towards Internet of Things movement these days. It is not that I have lost interest on the web standards but I just simply starting geeking out more with hardware.
I’ve always loved crafty things since I was a kid, and later in my life, I taught myself how to develop web sites, but I have zero background in electrical engineering. (Well, maybe I took some physics 101 or so, but just about it!) I can crochet and code but I didn’t know how to solder or wire. Also, I don’t know how to code in C (or something that I imagined I needed to know to program hardware). I got myself an Arduino Uno a few years ago, but I haven’t even opened the box for a long time.
So you wonder how I, a front-end web developer, got involved on hardware hacking.
I Can Code in Node! Controlling Tessel with Node.js
Last year, I heard about Tessel. I initially thought it was an another microcontroller that I would never even bothered, but I was so wrong. I gave it a try, and within a few hours after I touched Tessel and a camera module, I was already able to make it take my selfies and tweet it!!!
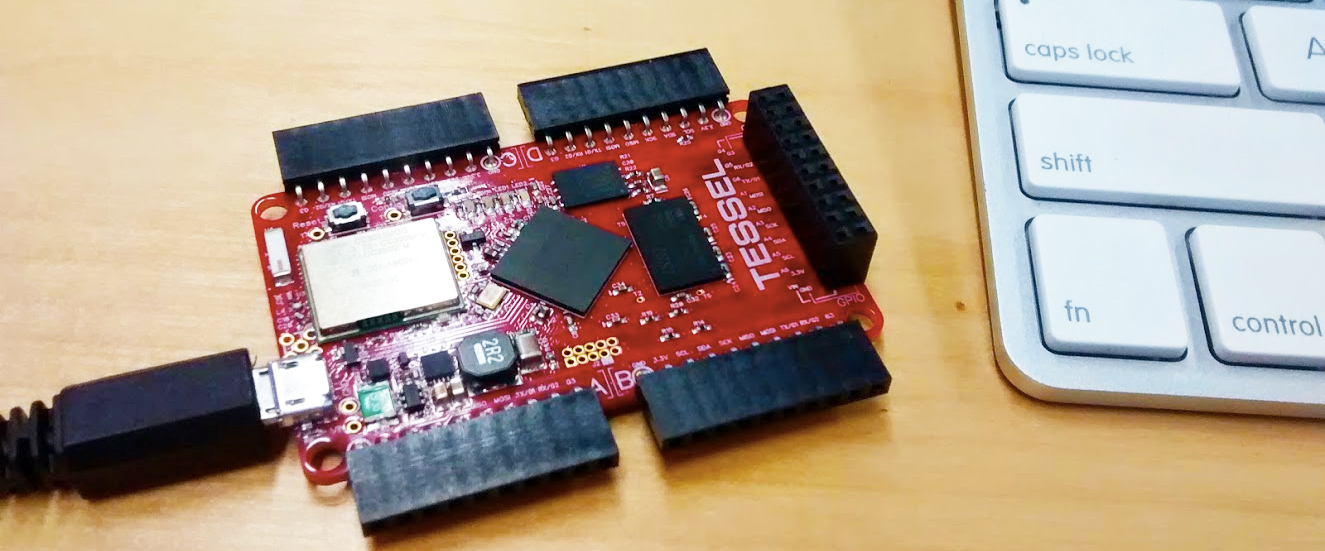
There are two main reasons why I was able to do so easily:
First, Tessel runs JavaScript, and because each Tessel contains a built-in wifi chip, internet-enabled JavaScript programs can be run directly from the device. Secondly, Tessel supports easy plug-and-play modules so I don’t have to know how to wire to be able to use sensors. Each module has an open source library on npm, so it’s literally plug, npm install, and play.
This simple code below snaps photos with Tessel. If you code in Node.js, you can see how easy it is to take a snap with Tessel.
var tessel = require('tessel');
var camera = require('camera-vc0706').use(tessel.port['A']);

camera.on('ready', function() {
  camera.takePicture(function(err, image) {
    if (err) {
      console.log(err);
    } else {
      var name = 'pic-' + Date.now() + '.jpg';
      process.sendfile(name, image);
      camera.disable();
    }
  });
});
JavaScript All The Things! Meet Johnny-Five
While I was wondering if Tessel is only microcentroller that runs JavaScript, I met Johnny-Five.
Johnny-Five is an Open Source, Firmata Protocol based, IoT and Robotics programming framework for Node.js, developed by Rick Waldron and his team at Bocoup. (Congrats on the new web launch!)
What does this mean to me?
It means I can start playing with other microcontroller in JavaScript, even if they uses some other languages I don’t know, such as Sketch (based on C) for Arduino.
Johnny-Five is supported by variety of Arduino-compatible Boards, also with using IO plugins, it supports many more boards regardless of the languages and platforms! This makes my hardware-hacking adventure so much easier.
Thanks to the team, using Johnny-Five is super easy. To blink an LED (in this example, with Auduino Uno), all you need to do is npm install johnny-five then write in Node.js like this:
var five = require('johnny-five');
var board = new five.Board();

board.on('ready', function() {
  var led = new five.Led(13);
  led.blink(500);
});
Snapping littleBits with Johnny-Five
A year ago, I bought littleBits Auduino Starter Bundle, when they announced the Auduino at Heart module at MakerFaire.
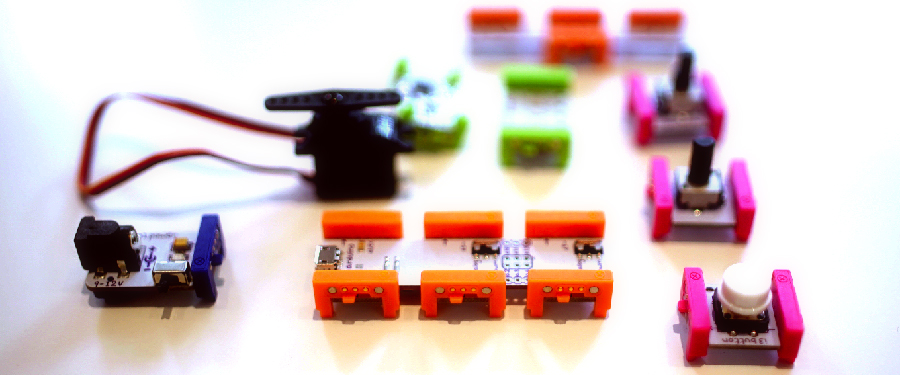 My littleBits, photo by my coworker, Eric Grossman
littleBits is a colorful electric modules with open-source libraries. Like Tessel, assembling the circuit is easy and it doesn’t require wiring. Actually, littleBits is far more kids-friendly that you can snap together with magnets.
Although littleBits works with no programming, you can snap modules with Arduino and easily incorporate programming into the circuits.
Thanks to Anna Gerber, who gathered all information and sample code to start programming littleBits with Johnny-Five, I can program littleBits with JavaScript, too.
As my first easy and fun project with littleBits & Johnny-Five, I created a Blinking notification of Twitter.
I documented and wrote an article about this project, so please check it out on my PubNub blog, Triggering littleBits LEDs with Node.js Using Johnny-Five.
Baking Raspberry Pi with Johnny-Five
My next encounter was Raspberry Pi. Luckily, I have handful of hardware-hacking coworkers, who I can bug to ask questions.
Raspberry Pi is a fully-functional single-board computer, rather than a microcontroller, and you can run operating system like Linux and FreeBSD (and Microsoft has announced Windows 10 for Raspberry Pi 2 recently, and I just installed it to try out!) from a micro SD card. Plug it into a monitor, keyboard, and a mouse, you have a full graphical user-interface of an OS of your choice (I picked Raspbian).
As usual, I wanted to start with LED blink, which I call Hello World of hardware. Unlike Tessel and Arduino, RPi board does not come with an LED, so naturally, my initial challenge was to complete the circuit. Here is the challenges (I think) I conquered:
####First Challenge: Get Familiarize with Breadboards
There are conductive metal strips goes horizontally on the back of both breadboards, except, for a 400-pin breadboard has positive and negative rails (power rails) that run vertically along the sides. Once a wire is inserted, the component will be electrically connected to anything else placed in the same row.
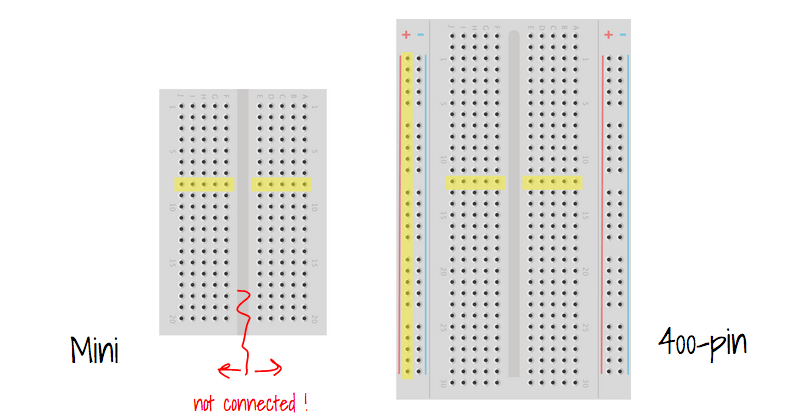
OK, I got it.
Next, Know Your LED
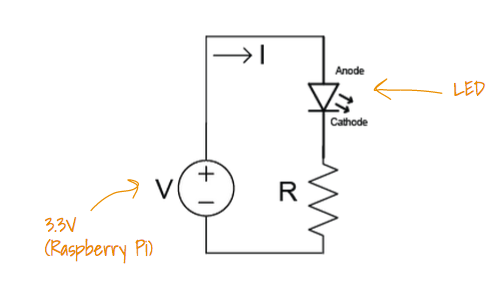
LEDs are polarized and only allow current to flow in one direction. The first thing I had to learn was that anode should be connected to the power source, and the cathode should be connected to the ground. Each LED has two legs, a long one is an anode (+), and a short one is cathode (-).

Ohm’s Law and Resistors
But I am not supposed to just plug wires to a power source! Because LED has controlled current, and if I sent one too much voltage, the LED would be burned out. So I need to use resistors to limit the amount of current through an LED.
The LED I bought on Amazon came with a data sheet, so I can just use the numbers to calculate how much resistor I need:
R = (Vs-Vf)/I
- Voltage Source (Vs) from RPi is 3.3V.
- Forward LED voltage (Vf) is 1.9V (According to the data sheet)
- Current through the LED is 20mA = 0.02A (Also from data sheet)
So, R = (3.3v - 1.9v) / 0.02 = 70Ω
OK, the package of LEDs I bought came with a bunch of 200Ω resistors, so let’s just use it. The intensity of the light gets lower, but it is safe to use for sure.
Well, I never imagined some day I became a good friend with Ohm’s Law when I studied it in high school…
Now I understand how to read this circuit:
Understand GPIO Pins
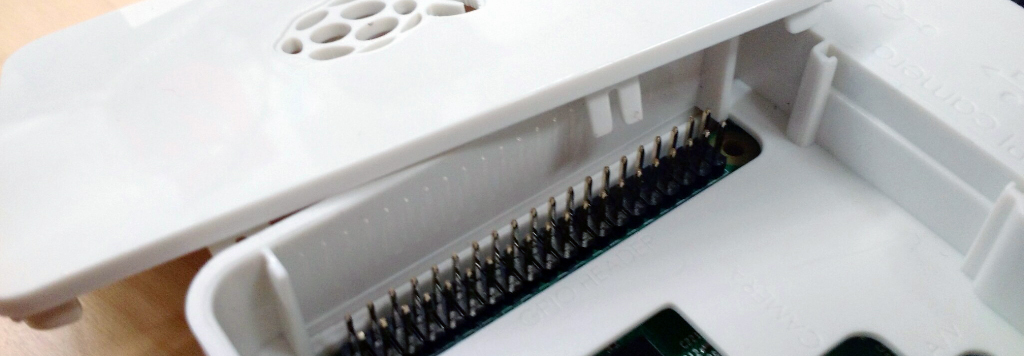
Raspberry Pi has the GPIO (General Purpose Input Output) pins, which are a physical interface between the Pi and the outside world. Awesome, I can program the pins to interact the inputs and outputs, for instance, I can send data from sensors and/or to devices such as LEDs!
Wire Them Up!
Now I put them together, build the circuit on a breadboard using wires.
Use some color convention to avoid confusion:
- Black wires for ground
- Red wires for voltage
(Or, use gray and pink if you want!)
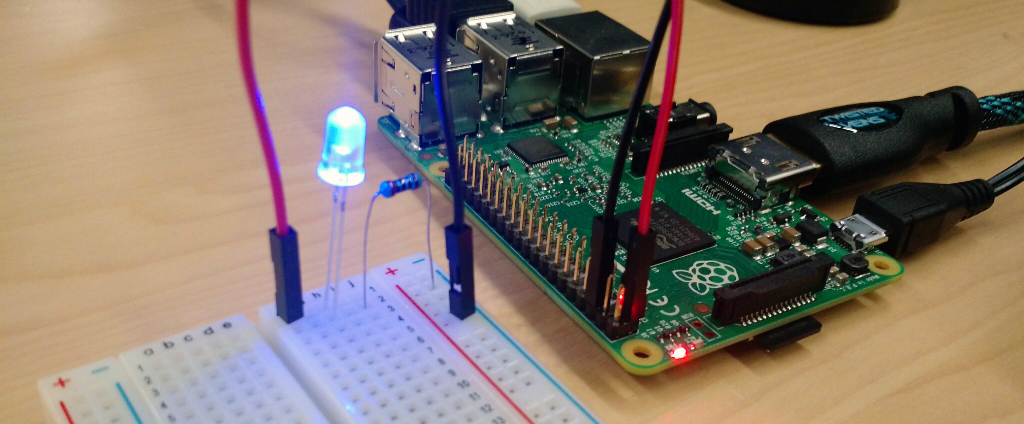
Initially, I tested with Raspberry Pi’s 3.3V Pin (Red wire) to see if LED lights up just fine, then, re-wire the red wire to a GPIO pin (in this example, GPIO 4, at Physical pin 7; There are two different pin number schemes!) so I could light LED programmatically.
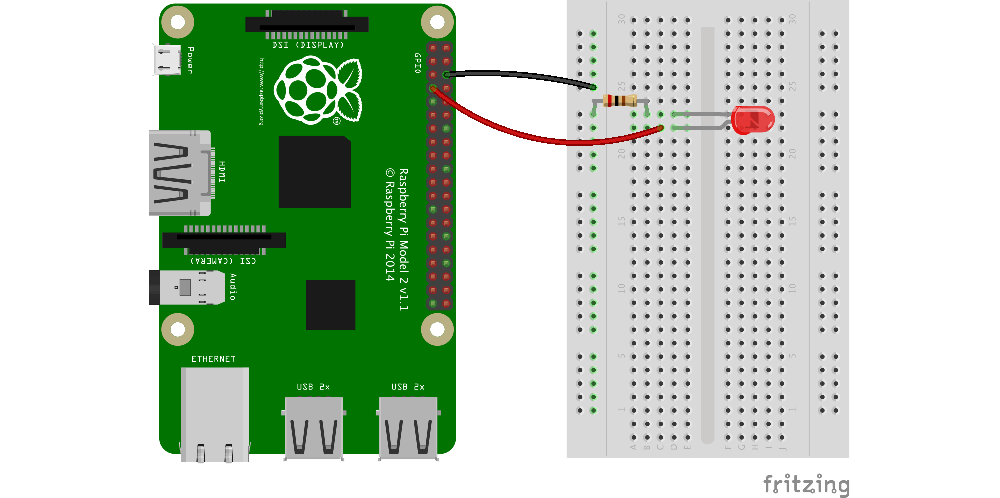 I used this super awesome open-source tool, Fritzing to draw the breadboard!
Blinking a LED with JavaScript
Finally, it is an easy part- use Johnny-Five again to program the LED.
To use Johnny-Five with RPi, you need the I/O plugin, raspi-io, written by Bryan Hughes.
Manipulating the LED wired to a GPIO is as easy as:
var raspi = require('raspi-io');
var five = require('johnny-five');
var board = new five.Board({io: new raspi()});

board.on('ready', function() {
  var led = new five.Led('P1-7'); // Pin 7 (GPIO 4)
  led.blink(500);
});
Ta-da! I was just a front-end person, writing JavaScript to build web. Now I can write JavaScript to control hardware! How awesome is that?
I Hack Hardware So You Can Do Too
A few wirings (or maybe more) later, I even ran an Internet of Things Workshop with Raspberry Pi for noobs at IoT Stream Conf in April.
With big helps from my awesome coworkers, Bhavana, Eric, and a Raspberry Pi Evangelist Matt Richardson, I played as an instructional designer to create a workshop curriculum, also as an instructor at the workshop so I could share my experiences with people who wants to get their hands dirty with Raspberry Pi too.
If you are interested, you can take a look at the workshop material and docs on GitHub. The workshop walk-through slides are available, too.
Happy hardware hacking!
Learn More:
- Tessel Docs by Technical Machine
- Johnny-Five by Bocoup
- Johnny-Five IO plugin for Raspberry Pi by Bryan Hughes
- Programming littleBits with Johnny-Five by Anna Gerber
- Raspberry Pi Documentations by Raspberry Pi Foundation
- Learn Raspberry Pi by Ada Fruit
Also, Check them out:
- Tessel by Technical Machine
- littleBits by littleBits Electronics
- Auduino at Heart by Arduino
- Raspberry Pi by Raspberry Pi Foundation
- ← Doodle with Strangers! Multi-User HTML5 Canvas with PubNub API
- Hey, I am on The New Screen Savers Show! →
